Archive for April, 2014


I was not too keen on making this cake, but I found it in one of my FoodNetwork magazines, and I happened to mention it outloud to my mother and she was like, “Oooo, that sounds good.” And I was like, really? Doesn’t sound like my cup of tea, but I forgot, my mother likes peppermint. So for a second opinion, also forgetting what a candycane freak my sister is, I asked her if she wanted me to make it and she’s like, “YEAH!” Geez. Okay. I’ll make the freaking cake – but I’m not eating it.

IMAG2362

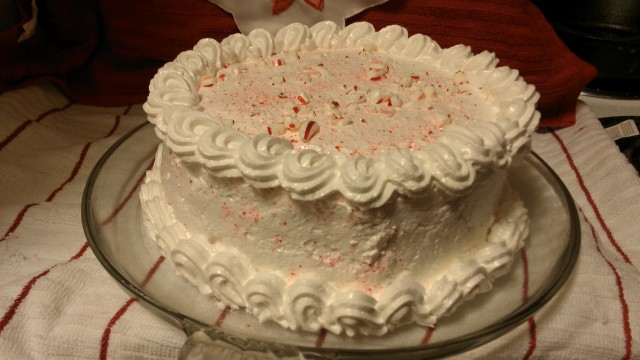
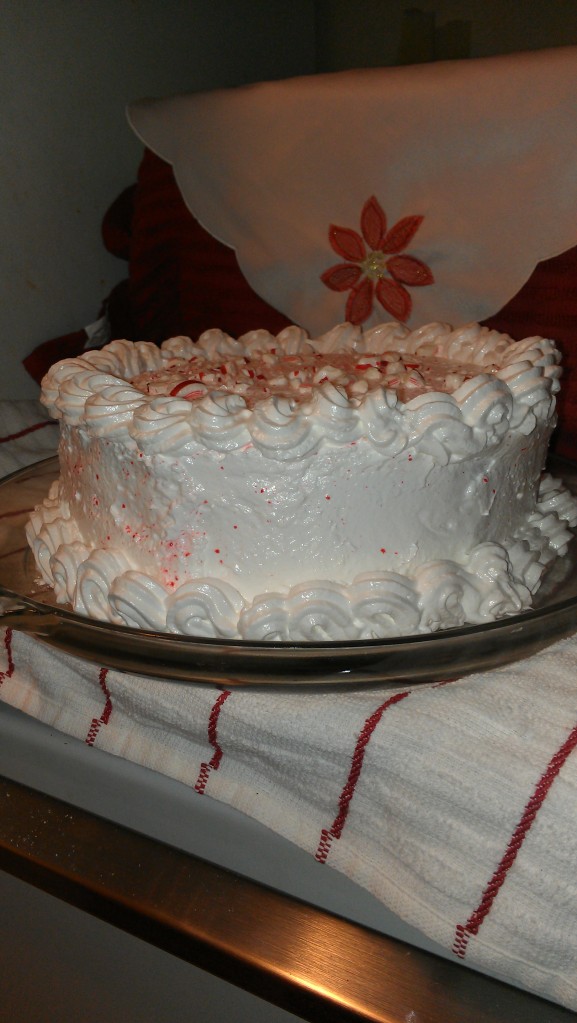
Peppermint Layer Cake with Candy Cane Frosting

Wooooooooo, did this cake have a peppermint punch when you SNIFFED it, let alone tasted it. For the record, I never ate a full slice, just a bite or two. My sister and mom ate full slices though, and I don’t know how they managed. I mean if you love peppermint, it was proably a very yummy cake. But I’m adding chocolate next time. And fixing the frosting.

I don’t know exactly what, but I have an idea, it had been a long time since I made a frosting like this one, so it turned out… strange, I guess. My sister wasn’t a big fan of it. And if I had a better kitchen (and if you follow my blog, you konw my complaints about my kitchen) I would probably have made this frosting again on a smaller scale and worked on it. However, I don’t, so I don’t know what I’ll do next or this Christmas. They like the cake cake part, but the frosting needs work, apparently. I didn’t really try it so I don’t know. Like I said, not a big fan of peppermint.

Okay. Here’s the recipe out of Food Network Magazine, December 2013 issue.

Peppermint Layer Cake with Candy Cane Frosting

Ingredients:IMAG2389
For the cake:
1 1/2 sticks unsalted butter, at room temperature, plus more for the pans
2 cups sifted cake flour (sift first, then measure), plus more for dusting
1 1/2 teaspoons baking powder
3/4 teaspoon salt
3/4 cup whole milk, at room temperature
1 teaspoon vanilla extract
1/2 teaspoon peppermint extract
1 1/2 cups sugar
3 large egg whites, at room temperature

For the frosting:
1 1/2 cups sugar
1/2 cup light corn syrup
6 large egg whites
Pinch of salt
1/2 teaspoon vanilla extract
1/2 teaspoon peppermint extract
1/4 cup crushed candy canes, plus more for topping

Peppermint Layer Cake with CandyCane Frosting

Peppermint Layer Cake with CandyCane Frosting

Directions
1 – Make the cake: Position racks in the middle and lower thirds of the oven and preheat to 350 degrees F. Lightly butter three 8-inch-round cake pans and line the bottoms with parchment paper; butter the parchment and dust with flour, tapping out the excess. Sift the flour, baking powder and salt into a medium bowl. Combine the milk and the vanilla and peppermint extracts in a small bowl; set aside.
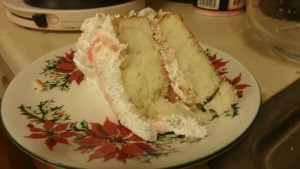
IMAG23902 – Beat the butter in a large bowl with a mixer on medium speed until smooth, about 1 minute. Gradually beat in 1 cup sugar, then increase the mixer speed to high and continue beating until light and fluffy, about 5 minutes.
3 – Reduce the mixer speed to low and add the flour mixture in 3 additions, alternating with the milk mixture, beginning and ending with the flour mixture, until just combined. Scrape down the side of the bowl, then increase the mixer speed to medium and beat until smooth, about 5 more minutes.
4 – In a separate large bowl (using clean beaters), beat the egg whites with a mixer on high speed until foamy. Gradually add the remaining 1/2 cup sugar and continue beating until stiff, shiny peaks form, about 6 minutes. Using a rubber spatula, gently fold the whites into the batter in 3 additions until combined.
5 – Divide the batter evenly among the prepared pans. Bake, switching the position of the pans about halfway through, until a toothpick inserted into the center comes out clean, about 20 minutes. Let the cakes cool 10 minutes in the pans, then run a knife around the edges and invert onto racks to cool completely. Peel off the parchment. (The cakes can be made up to 1 day ahead; wrap in plastic and store at room temperature.)
6 – Make the frosting: Fill a medium saucepan with 1 to 2 inches of water and bring to a simmer over medium-high heat. Combine the sugar, corn syrup, egg whites, 2 tablespoons water and the salt in a heatproof bowl and set over the saucepan (do not let the bowl touch the water). Whisk until the sugar dissolves and the mixture registers 165 degrees F on a candy thermometer, about 8 minutes. Remove the bowl from the pan and beat with a mixer on medium speed until soft peaks form, about 5 minutes. Increase the mixer speed to high and beat until fluffy and cool, about 4 more minutes. Add the vanilla and peppermint extracts and beat until combined, 1 more minute.
Assembly: Place 1 cake layer on a platter and spread 1 cup frosting on top; sprinkle with about 2 tablespoons crushed candy canes. Top with another cake layer, spread with 1 cup frosting and sprinkle with another 2 tablespoons crushed candy canes. Top with the final cake layer, then frost the top and side of the cake with the remaining frosting. Sprinkle more crushed candy canes on top.
IMAG2373

I really need to post these things right after I make them, because then I can tell you what went wrong and how to improve it. But now, five months after I made the thing… or has it been four? Five, four, whatever, point is I can’t remember much. I do remember the cake and the frosting together was very minty and too much for me. But by themselves, either was good. I think I might try doing a peppermint cake with a chocolate additive to the frosting, or a drizzle of chocolate, something to just lesson the peppermint just enough.

DON’T put your candy cane sprinkles on the top until right before serving or the sugar content melts together. Other then the frosting being too… marshmellowy it turned out well I think.

That’s all for this post, sorry I don’t have enough, what I would have done different, but it’s just too hard. When I make it again, I’ll post a new one and tell you more.

Until next time,

Jessi


To be quite honest – I made these cupcakes so long ago, I can’t remember ANYTHING about what I did to make the actual cake part, just the frosting. If my memory serves me correctly, I might have made them simply because I was trying out a new frosting recipe and the cake may actually be Betty Crocker chocolate cake mix. But I really can’t remember.


Chocolate Cupcakes with Blue Buttercream Frosting

Chocolate Cupcakes with Blue Buttercream Frosting

I do remember how unhappy I was with the texture of the finished buttercream, although the flavor was AMAZING. I’ve remade the same buttercream and had the same texture, but was slightly better than before, although I did not take pictures of  those cupcakes.

Choclate Cupcakes with Blue Vanilla Buttercream3As I’m almost positive I did use a store bought mix for the cake part, I’m just going to give the buttercream recipe.

VANILLA BUTTERCREAM

Ingredients:

  • 1 cup milk
  • 5 tablespoons all purpose flour
  • 1 cup butter
  • 3 cup confectioners’ sugar
  • 1 teaspoon vanilla extract

DirectionsChoclate Cupcakes with Blue Vanilla Buttercream4

  1. Stir milk and flour together in a saucepan over low heat; cook, stirring constantly, until thick, about 5 minutes. Cool mixture in refrigerator until cold to the touch, about 15 minutes.
  2. Beat butter, confectioners’ sugar, and vanilla extract together in a bowl until light and fluffy.
  3. Stir cooled milk until smooth. Slowly beat into the butter mixture until frosting is of a spreadable consistency. For a thicker icing, you may not need the entire milk mixture.

Note: Make sure the butter is still slightly stiff, and not completely soft, this will make a difference. But also make sure it’s not to hard, or you’ll get lumps of butter in your frosting.


For best results, I think next time I make this, as I’m STILL testing out this recipe to get the proper texture I want in Choclate Cupcakes with Blue Vanilla Buttercream1my frosting, I’m going to make sure everything is as cold as I can get it when mixing and hope this makes a difference. Also I think I might add more flour, I think it might not have enough to hold up for what I want it to do. Although I do know that this time was better than the last time I made it. I’ve made this recipe a total of like three times, and the first was HORRIBLE, the second better, and the last time was in the dead middle of summer and the heat was TERRIBLE, so the butter in the frosting was like *slunk” and just slid off when it had to travel in a vehicle with NO AIR CONDITIONING. Yuck. I’ll keep ya posted about it. (It will not be the Watermelon Cake.)

Choclate Cupcakes with Blue Vanilla Buttercream8 (2)

These cupcakes were really good otherwise though. People at work liked them, and my sister gobbled them up (when doesn’t she?) so despite my lapse in baking judgement for using store bought cake mix – they turned out well. I haven’t used a box cake mix since then, despite there being three currently sitting in my pantry.  One’s a yellow cake mix, one chocolate and the other is carrot cake, complete with a frosting can (ew) to go with it. I have no urge to ever use the box. It’s really there for when I need a super quick backup.

Well, that’s it for this post. Until next time –

JessiChoclate Cupcakes with Blue Vanilla Buttercream12

It was two days past my eighteenth birthday, a day I consider one of the absolute worst days of my life – the day my father died. That was seven years ago – and this blog is not about my father. It’s about something I’m sure that people have made forever – even if you’ve never tried it.

IMAG1628

It’s a simple thing, really, but one of my favorite meals  that my father used to make. So when I make it these days – sometimes, I think of my dad.

Like I said, it’s simple, super easy, something you could do with your kids seeing as how my dad did it with me. Hotdogs wrapped in biscuits. See, super easy? Of course, the prep is like ten minutes, maybe less if you’ve done it so many times and have everything ready.

Important things to know – Get the buttermilk ones with the little flavor butter melts throughout the biscuit, not the flaky layer biscuits, those are horrible for these.  And I do mean horrible, you get unsatisfactory results, even though they’d pretty much taste the same if you did. You can also use croissants if you like, but I find the biscuits taste better. My dad used to use croissants when he made these in the morning with sausage (but not breakfast sausage, like polish sausage) and called them kolaches or something like that.

Sometimes when you bake these, the ends come undone, but it still tastes good. I hope you enjoy. I like to eat mine with ketchup.

Ingredients:

1 package of  hotdogs (8)
1 package of buttermilk biscuits (8)
8 slices of American cheese

Utensils:
1 cutting board
1 sharp knife for cutting
1 rolling pin
2 cookie sheets
Non-stick cooking spray

Directions:

1) Preheat oven to 375°F and spray one cookie sheet with non-stick cooking spray. Put the other cookie sheet under the one you just sprayed. This prevents your biscuit bottoms from burning.

1) Pull all of the hot dogs out of the package and make lengthwise incisions down each hotdog.

2)Unwrap the cheese slices and then open the slits on the hotdog and place the cheese into them so that they kind of hang out of the hotdog.

3) Open the biscuits and place them on the cutting board. Roll out the biscuits one way first and then only slightly the other way so they make a oblong shape, this is important. You don’t want a nice round circle, unless you want to experiment and make your own version of a corn dog without the dipping and frying.

4) Place the hotdog with the cheese on one side, and roll it up, making sure to press slightly at the end as sort of a seal. Put the rolled up hotdogs on the cookie sheet and bake them for 12 to 15 minutes until the tops are golden brown.

5) Let cool a couple of minutes and then serve. I eat them with ketchup. Yum!


Like I mentioned, this dish, while SUPER simple, and anyone can make, you’ve probably made it yourself before, reminds me of my father, which was the whole intention of posting this today.

I miss my father, a lot. I think of him often enough, like, everyday. So Daddy, I miss you and I love you. This post is for you.

Until next time –

Jessi

Long time, no see, right?

It’s been nearly a year since my last update, so I should, concievably, have a lot to post, right? Well I probably do and I just can’t remember. Whatever. This is just a quick update in case anyone actually follows this.

If I had a proper kitchen, this would probably be updated frequently. But I hate my kitchen and ever since my best friend moved in, there’s even less room. But we’ll see about getting better at updating this thing. *sigh*

Life Update: No, I’m not dating anyone knew. No, I don’t have a job doing what I love, writing OR baking. Which sucks. BUT, I am moving next month from Michigan to Texas. BIG CHANGE. That’s mostly what this next month is going to focus on. I also just quit my job working midnights as a cashier at a localized to the Midwest retail store.

So expect a few updates coming – baking ones. Because I don’t have anything on the writing front which I’ve never kept updated anyway. Actually, I might return to my research for that one book that THERE is a post about. If you wanted to go look it up in archives. If I update about that, I’ll post a link then.

Until next time, toodles.

~Jessi~